Welcome to week two! This is the week we finish the body of Ulysses and start putting him together.

~Hi!~
When I was writing the pattern, I really wanted to focus on texture (that’s why some parts are purl side out, and others are not), and on skills that I felt were good things to have in the knitting toolbox, but that people avoid (or that I avoid- I am an avoider). I also wanted Ulysses to have a good seat to sit on, and that’s where we will start today.
This week’s hack will focus mainly on the body and how to get out of that provisional cast on at the beginning, look for that option at the bottom of this page if that sounds good to you. (I highly, highly, highly recommend this hack. Highly.)
The video for the beginning of the body can be found here.
Key- Knit, Purl, W&T (wrap and turn), SSK (slip slip knit), K2TOG (knit 2 together)
Body-
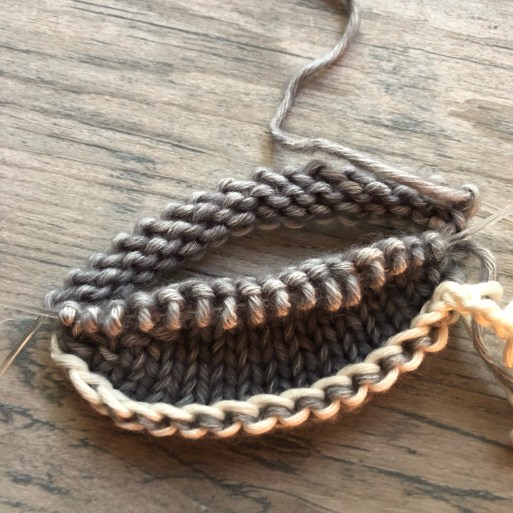
Using a provisional cast on and waste yarn, CO 32. Knit one row into your provisional cast on with grey yarn, then join to knit in the round.

~Provisional cast on~
Begin short rows for bottom-
1- Knit 15, W&T
2– Purl 14, W&T
3– Knit 13, W&T
4– Purl 12, W&T
5– Knit 11, W&T
6– Purl 10, W&T
7– Knit 9, W&T
8– Purl 8, W&T
9- Knit around
~Short rows for seat~
10-29– Knit each round
Begin decreasing
30– K3, SSK, K6, K2TOG, K6, SSK, K6, K2TOG, K3= 28 sts
31– Knit around
32– K2, SSK, K6, K2TOG, K4, SSK, K6, K2TOG, K2= 24 sts
33– Knit around
34– K1, KKS, K6, K2TOG, K2, SSK, K6, K2TOG, K1= 20 sts
35– Knit around
36– SSK, K6, K2TOG, SSK, K6, K2TOG= 16 sts
37– Knit around
38– Bind off in pattern
**TURN INSIDE OUT (and leave the provisional cast on alone)**


~Body front and body back~
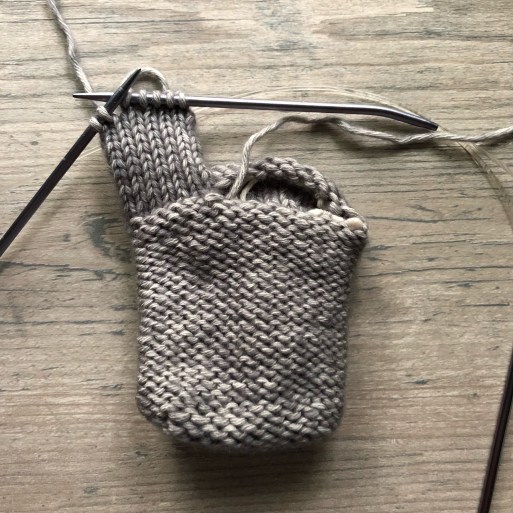
Lets get started with the legs. If you have not turned the body inside out or purlside facing or “wrong side out”- do so now! Right now. Do it… I’m waiting….
Okay. Organizing stitches. This is the part when I started questioning my sanity about using a provisional cast on, because it can be scary to take the cast on out. It can be confusing, it can be frustrating. It can also lead to a very nice, seamless continuity between legs and bottom. With that last part in mind, we begin.
Because we begin the legs using stitches from a provisional cast on, we need to remove the waste yarn and put some stitches on needles, and return others to waste yarn. Because we have turned the body inside out, the cast on opens on the left, back side of the body, so its best to start with the left leg.
Begin to remove waste yarn stitch by stitch and place the first 8 stitches on needle. Next, put the end of your waste yarn on a darning needle and place the next 16 stitches back on that waste yarn (these will become your right leg), then place the last 8 stitches on a needle. The stitches on the needles will become your left leg. Here is a slightly sped up video of this process. You can even see me almost drop the last stitch!
Left leg: Join grey yarn, and begin knitting at the front crotch, working toward the left hip, and working around from there.
1– SSK, K12, K2TOG= 14 sts
**2-20– Knit around
Begin short rows for heel. This is the same process as the short rows worked for the body, but you’ll notice a difference after the initial wrap and turns. You will keep going and pick those stitches back up using the same process. This creates the gusset that is Ulysses’ heel. This is sock making territory, and if you can make Ulysses, you can make your own awesome footwear. Keep your counts together, and you’ll do fine.
21– K16, W&T
22– P11, W&T
23– K10, W&T
24- P9, W&T
25– K8, W&T
26– P7, W&T
27– K6, W&T
28– P5, W&T
29– K4, W&T
Turn the heel
30– K4, W&T
31– P5, W&T
32– K6, W&T
33– P7, W&T
34– K8, W&T
35– P9, W&T
36– K10, W&T
37– P11, W&T
38– Knit around
39-43– Switch to white yarn and knit each round
(begin stuffing leg)
44– K2TOG 7 times, thread through remaining stitches (makes sure you’re happy with the stuffing of the leg at this point) and pull closed tightly.
Right Leg: Once you’ve placed the remaining stitches on needles, begin to knit starting at the right hip, working toward the crotch.
1- Knit 6, K2TOG, SSK, K6= 14 sts
Continue on as for left leg from ** on.


After you’ve stuffed and closed both legs, use some of your grey ends to create a bend at the hip. Stitch along the top leg stitches straight across. This will help legs bend where they are supposed to and prevent drift of the stuffing in the future. Pay special attention to his crotch area here. If there are gaping issues, stitch them closed with your remaining yarn. Weave in all remaining ends. Finish stuffing body.
You can now sew the head onto the body. Use your needles or large darning needles to hold it in place as you sew around. Make sure he is facing his toes and not his bottom. Secure ends. I usually pull the end down toward the tail area, and speaking of that…
Tail:
With grey yarn, CO 8 sts
1– Purl
2– Knit
3- Purl
4– SSK, K4, K2TOG = 6 sts
5– Purl
6– SSK, K2, K2TOG = 4 sts
7– Purl
8– SSK, K2TOG = 2
9– P2TOG/tie off
You’ll sew the tail on in the same way you sewed the ears on, just not in the same place. Fold in half, with knit side in, and sew on at base of back. It helps to sit Ulysses down so you can see where his back meets his bottom. You can use the tail to hide ends from the head while attaching to the ends from the tail.
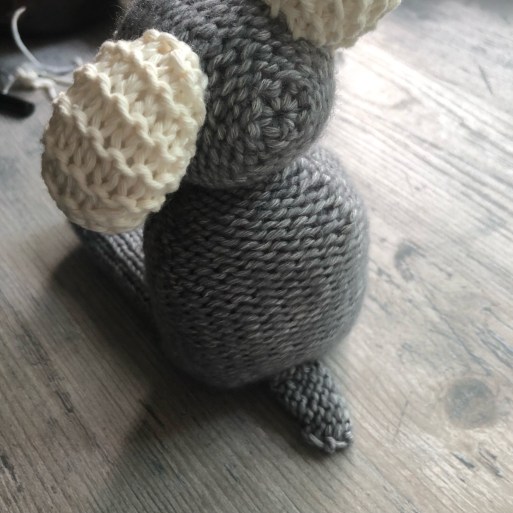
~Little tail~
Finally, the arms. We can’t forget the arms. If you finished the arms in week one, you’re all set. If you need to create them still, you can find them here. Attaching the arms is simple and pretty straight forward. While Ulysses is sitting down, his “hands” should be touching whatever he is sitting on. Remember to not over stuff the arms. There should be no stuffing at his shoulder at all.
Fold your open end in slightly, and sew down to the body making three or four circles from arms through body and back again. I usually pull one end through to the other arm and tie a knot under the armpits. Then, put ends on a darning needle, and draw through the body, pull and snip as before.
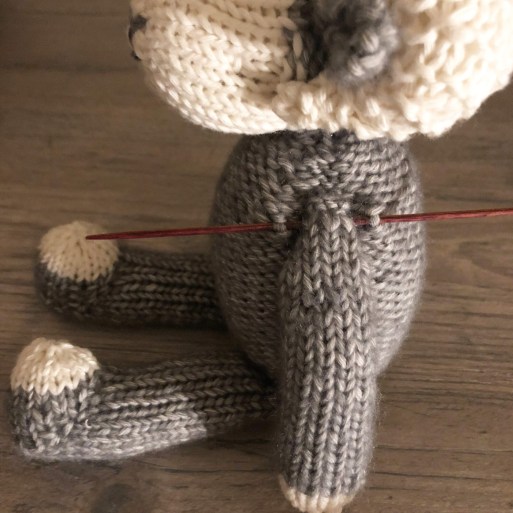
~Please don’t leave this stick in my arm~
If your Ulysses has any ends flapping around, now is when you deal with those by securing and weaving in. I find that his hips are the main collector of stray yarn, mainly because of the way the legs are attached. I do a lot of knot tying in my toy making. This is not always seen as “right” by people who do things “right”, but I feel it makes the piece sturdier and safer.
Hacks! I am going to… tah dah… give you the body pattern top down. No provisional cast on! No need for crochet hook! You do have to sort your leg stitches prior to turning inside out, though. Unless you want to have a major fight with your pointy sticks.
Here goes-
Body/Top down-
CO 16 and join to knit in the round
1– Knit
2– K1, M1R, K6, M1L, K2, M1R, K6, M1L, K1 = 20 sts
3– Knit
4– K1, M1R, K8, M1L, K2, M1R, K8, M1L, K1 = 24 sts
5– Knit
6– K1, M1R, K10, M1L, K2, M1R, K10, M1L, K1 = 28 sts
7– Knit
8– K1, M1R, K12, M1L, K2, M1R, K12, M1L, K1 = 32 sts
9-29 – Knit each round
Begin short rows-
30– Knit 15, W&T
31– Purl 14, W&T
32– Knit 13, W&T
33– Purl 12, W&T
34– Knit 11, W&T
35– Purl 10, W&T
36– Knit 9, W&T
37– Purl 8, W&T
38– Knit around- do not bind off.
Organize your stitches- Put your stitches on waste yarn and turn inside out. You’re ready to work on legs.
See you next week! Remember to post your progress on Instagram and Facebook with the hashtags #Ulyssestheram #cornellcollege #knitalong and #wrenandstarling
